The Development Environment
Client Software
- Visual Studio Code
- Web Browser (We assume Chrome, but any modern, up-to-date browser will work like Firefox, Safari, or Chromium derivatives)
- Postman or Bruno
Development Tools
- This project will use Node.js throughout.
Development Platform
Windows Users: You will need to install the Windows Subsystem for Linux (WSL):
Install WSL | Microsoft Learn
MacOS Users: You will need to install either Xcode or the Xcode command-line tools:
Installing the command-line tools | Apple Developer Documentation
Linux or Droplet Users: You already have what you need to get started.
The MERN Architecture
Unlike the LAMP project, where front-end and back-end files were hosted from the same location (/var/www/html), using the same server (Apache), the MERN projects separates these out.
Remember that the benefit of the multi-tier or “stack” architecture is that a web application can be deployed in a distributed manner – front-end can be served from one server, back-end on another, and database on yet another. Of course, we’re working on a smaller scale, we’re not hosting the application across multiple servers, but rather a single server. However, we can still deploy in a manner that simulates a distributed deployment:
600x600%20-%20Dev%20Stack%20Diagram.svg)
We’ll initially start developing this project on your local machine (i.e., your laptop or desktop).
Notice that both the front end and the API live locally on your computer. We’ll update this when we deploy to production, but this will do for now and will be useful as you progress in your MERN project.
In the end of this tutorial, you’ll be running two servers: The Vite development server for your front-end and Node Express for the API. The database will be remote using the MongoDB Atlas cloud service.
In the Getting Started with MERN B (version 2.0).md) tutorial, we’ll transition to the production configuration on your remote droplet.
Install Node Version Manager
The version of Node provided by your system’s package repository may be too old for our needs. Furthermore, these “native package” installations require elevated privileges in order to install global packages such as Nodemon.
By using Node Version Manager (NVM), we gain full control over the version of Node we install and use (and in fact can install and run several versions if desired). Further, the NVM-managed Node is installed under your home directory and thus global installations don’t require elevated privileges.
Run the NVM install script
In your browser, navigate to https://github.com/nvm-sh/nvm
On the table of contents, click on “Install & Update Script”
You’ll be presented with two long command-lines, one using the curl utility, the other using wget. It doesn’t matter which one you pick, so long as the command exists on your system. The curl option usually works for me.
Copy and paste the command into terminal window.
Follow the instructions after the installation completes:
Restart the terminal session.
Once you log back in, install the latest version of Node using NVM:
Install Nodemon
Nodemon is used in development environments to restart the back-end when changes are made to its source files. This way you get real-time feedback as you update the code.
The Cards Application
- You will be building a simple baseball cards collection database.
- The application supports the following operations:
- Login
- Add a Card
- Search for a Card
Setting up the Front End
Create the App Directory
We’ll use cards for the examples. The front-end can live anywhere in your home directory. These examples assume you’re starting in your home directory: /home/myuser on Linux and WSL, /Users/myuser on MacOS. (Replace myuser with your actual username. If you’re unsure of your username, type echo $USERNAME at the shell prompt)
Scaffold the Front End for the Cards App
While in the cards directory…
Answer
frontend for the project name.Answer
React for framework.Answer
Typescript for variant.Answer
No to Use rolldown-vite (Experimental)Answer
Yes to Install with npm and start now.
The Vite Dev Server
You’ll notice that running the Create command also spun up the dev server in your terminal window:
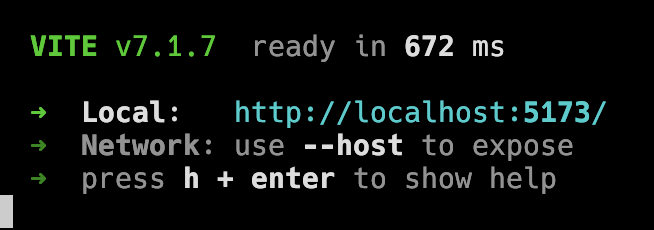
You can leave this running for the remainder of this exercise. As you add, remove, and update files, Vite will dynamically re-render the page in your browser. Going forward, where we ask you to Test, you can simply navigate to the Vite front-end URL, in this case:
http://localhost:5173
Note: Sometimes Vite won’t update the browser. Not sure why, but hitting Refresh (CTRL-R or F5) will update the page.
If you access the URL (http://localhost:5173) in your browser, you should see a page like this:

Create the necessary directories
Since our previous command shell is now taken up by Vite’s dev server,
open up a new shell/terminal and navigate back to your frontend directory and run these commands to build out the rest of the directories you’ll need:
Now you’re ready to start
Run Visual Studio Code
Load your cards directory in VSCode
Tip
Note, you can develop directly on WSL with VSCode:
https://code.visualstudio.com/docs/remote/wsl
Add React Components and Pages
Create the PageTitle and Login React Components
You will create two TSX files in the components directory:
PageTitle.tsx
function PageTitle()
{
   return(
     <h1 id="title">COP 4331 MERN Stack Demo</h1>
   );
};

export default PageTitle;
Login.tsx
function Login()
{
  function doLogin(event:any) : void
  {
    event.preventDefault();

    alert('doIt()');
  }

    return(
      <div id="loginDiv">
        <span id="inner-title">PLEASE LOG IN</span><br />
        <input type="text" id="loginName" placeholder="Username" /><br />
        <input type="password" id="loginPassword" placeholder="Password" /><br />
        <input type="submit" id="loginButton" className="buttons" value = "Do It"
          onClick={doLogin} />
        <span id="loginResult"></span>
     </div>
    );
};

export default Login;
Create the Login Page Itself
In the pages folder create:
LoginPage.tsx
import PageTitle from '../components/PageTitle.tsx';
import Login from '../components/Login.tsx';

const LoginPage = () =>
{

    return(
      <div>
        <PageTitle />
        <Login />
      </div>
    );
};

export default LoginPage;
Update App.tsx to load the LoginPage Component
You’ll want to replace the entire code for the default App.tsx with the following code.
App.tsx
import './App.css';
import LoginPage from './pages/LoginPage.tsx';

function App()
{
  return (
    <LoginPage />
  );
}

export default App;
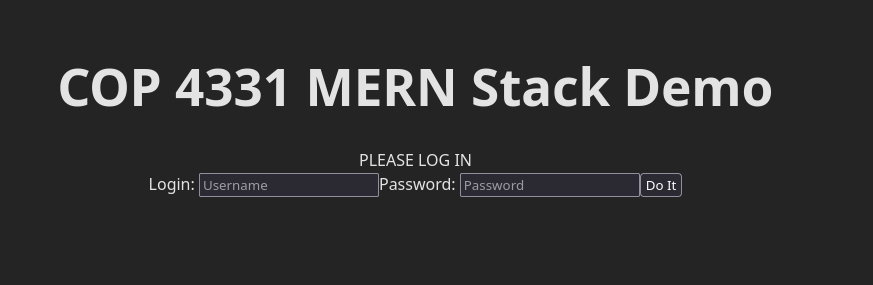
Test the Front End
Load your URL (http://localhost:5173) in your browser and you should see:
Open: Pasted image 20260301184848.png
28b39317d1330beff7431a667a98d02b_MD5.jpg
Setting up the Back End
Now we have a pretty web page that doesn’t do much (like a platypus). Let’s hook this up to a simple API server
Create the backend folder under your cards project folder and initialize the project
Take the default options (hit return)
For the entry point, enter
server.jsYou can hit return through the remaining questions.
Install Dependencies
We’re going to need additional modules to support our API:
Expressfor the basic framework. This makes dealing with routes and middleware a lot easier than rawdogging JavaScript.CORSstands for Cross-Origin Resource Sharing and it’s a security mechanism used by web browsers to ensure that remote resources (i.e. API calls) are trusted. Read more here: Cross-Origin Resource Sharing (CORS) - HTTP | MDNMongoDBis the client library that allows us to talk to MongoDB databases.
Add a nodemon run option
Edit package.json to add a line to the scripts section that will allow your server to run with nodemon:
Warning
Please note the comma at the end of the “test” line!
Create server.js
Create a new file called server.js and paste in the following code:
const express = require('express');
const cors = require('cors');

const app = express();
app.use(cors());
// app.use(bodyParser.json());
app.use(express.json());

app.use((req, res, next) =>
{

  app.get("/api/ping", (req, res, next) => {
	res.status(200).json({ message: "Hello World" });
  });
  res.setHeader('Access-Control-Allow-Origin', '*');
  res.setHeader(
    'Access-Control-Allow-Headers',
    'Origin, X-Requested-With, Content-Type, Accept, Authorization'
  );
  res.setHeader(
    'Access-Control-Allow-Methods',
    'GET, POST, PATCH, DELETE, OPTIONS'
  );
  next();
});

app.listen(5000); // start Node + Express server on port 5000
Test your server
In your backend folder, run:
Note that this will tie up your current terminal window, but just like with Vite earlier, nodemon will restart your server every time you make a file change. You’ll want to keep the dev window and open a new terminal if you wish to continue to code from the command-line.
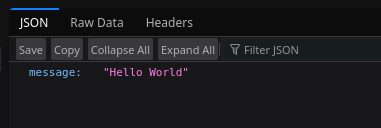
In your browser or in Postman, test this URL:
http://localhost:5000/api/ping
What you get back is JSON, which will be rendered differently in different browsers. I’m in Firefox, and I get:
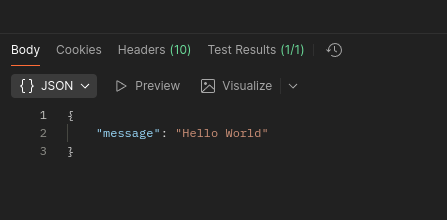
You can (and probably should) use Postman or Bruno to test as well:
Initialize your git repos
Before we go any further, let’s go ahead and “save” our work using git. You’ll want to create two repos: one for the front-end, one for the back-end. This will make production deployment a little easier later on.
The Front End
cd frontend
git init
git config --global user.name "Bob Bobson"
git config --global user.email "bob@ucf.edu"
git add .
git commit -m "Initial Commit"
The Back End
Generate .gitignore File
Unlike Vite, Node doesn’t give us a .gitignore file ready for use. We have to make our own. Fortunately, there’s an online tool for that: GitIgnore Pattern Generator - Create Custom Ignore Rules | GitIgnore.pro | GitIgnore.pro‘
Frameworks & Languages
- Node.js
File Types and Categories
- Everything except Dependencies and Documentation
Take the resulting output and paste it into a file called .gitignore in your backend directory.
Initialize the Repo
cd frontend
git init
git config --global user.name "Bob Bobson"
git config --global user.email "bob@ucf.edu"
git add .
git commit -m "Initial Commit"
Finish Up the Front End
Now let’s add more React components for showing the logged in user and displaying the main Cards UI.
Add LoggedInName Component
Navigate to cards/frontend/src/components and add LoggedInName.tsx:
function LoggedInName()
{
    var user={}
    function doLogout(event:any) : void
    {
	    event.preventDefault();
        alert('doLogout');
    };

    return(
      <div id="loggedInDiv">
        <span id="userName">Logged In As John Doe </span><br />
        <button type="button" id="logoutButton" className="buttons"
           onClick={doLogout}> Log Out </button>
      </div>
    );
};

export default LoggedInName;
Add CardUI.tsx:
function CardUI()
{

    function addCard(event:any) : void
    {
	    event.preventDefault();
	    alert('addCard()');

    };

    function searchCard(event:any) : void
    {
	    event.preventDefault();
		alert('searchCard');
    };

    return(
      <div id="cardUIDiv">
       <br />
       <input type="text" id="searchText" placeholder="Card To Search For" />
       <button type="button" id="searchCardButton" className="buttons"
           onClick={searchCard}> Search Card </button><br />
       <span id="cardSearchResult"></span>
       <p id="cardList"></p><br /><br />
       <input type="text" id="cardText" placeholder="Card To Add" />
       <button type="button" id="addCardButton" className="buttons"
          onClick={addCard}> Add Card </button><br />
       <span id="cardAddResult"></span>
     </div>
    );
}

export default CardUI;
Add CardPage.tsx to the pages folder:
import PageTitle from '../components/PageTitle';
import LoggedInName from '../components/LoggedInName';
import CardUI from '../components/CardUI';

const CardPage = () =>
{
    return(
        <div>
            <PageTitle />
            <LoggedInName />
            <CardUI />
        </div>
    );
}

export default CardPage;
Finally, update App.tsx so it loads our updated UI:
import './App.css';

import LoginPage from './pages/LoginPage.tsx';
import CardPage from './pages/CardPage.tsx';

function App()
{
  return (
    <CardPage />
  );
}

export default App;
Test
You should now see:

Routing and State
- Routing is how single-page applications like ours navigate to different Pages using URLs.
- State generically refers to web page data and the methods that update the data.
Install react-router-dom
From frontend folder:
Replace App.tsx to use Routing
This creates three routes:
/or the root route which corresponds tohttp://localhost:5173and loads the Login page./cards:http://localhost:5173/cardsand loads our Cards page.*: This is a wildcard that catches anything that hasn’t previously been defined and redirects it to/
//import React from 'react';
import { BrowserRouter as Router, Route, Navigate, Routes } from 'react-router-dom';
import './App.css';

import LoginPage from './pages/LoginPage';
import CardPage from './pages/CardPage';

function App() {
  return (
    <Router >
      <Routes>
        <Route path="/" element={<LoginPage/>}/>
        <Route path="/cards" element={<CardPage/>}/>
        <Route path="*" element={<Navigate to="/" replace />}/>
      </Routes>
    </Router>
  );
}
export default App;
Test
You should now just get a Login page:

Add state and routing to Login.tsx
We’ll want to be able to handle username (loginName) and password (loginPassword) data and display the results of the login attempt via a message.
Add state to Login.tsx
At the very top of the file, add:
Add routing to Login.tsx
Add the import { useNavigate } line after the import React line you added earlier:
Initialize Routing and State Handlers
Still in Login.tsx, add the following at the top of the Login() function:
  const navigate = useNavigate();
  const [message,setMessage] = useState('');
  const [loginName,setLoginName] = useState('');
  const [loginPassword,setPassword] = useState('');
Add Calls to Event Handlers to the Login input elements
Login: <input type="text" id="loginName" placeholder="Username"
          onChange={handleSetLoginName} />
Password: <input type="password" id="loginPassword" placeholder="Password"
          onChange={handleSetPassword} />
Edit span to add the result message
Add {message} in between the opening and closing <span> tags.
Add Event Handler functions to update State
Add these to the top of the main function Login(). These take the value of their respective input fields and, as the name implies, sets them in local state variables loginName and loginPassword defined earlier when we initialized state.
    function handleSetLoginName( e: any ) : void
    {
      setLoginName( e.target.value );
    }

    function handleSetPassword( e: any ) : void
    {
      setPassword( e.target.value );
    }
Add a feedback pop-up to the doLogin() function
This is temporary, just so we know we’re properly updating and passing data.
    function doLogin(event:any) : void
    {
        event.preventDefault();
        alert('doIt() ' + loginName + ' ' + loginPassword);
        navigate('/cards');
    };
Add state to CardUI.tsx
At the top of the file, add:
Initialize State Handlers
At the top of the CardUI() function, add:
    const [message,setMessage] = useState('');
    const [searchResults,setResults] = useState('');
    const [cardList,setCardList] = useState('');
    const [search,setSearchValue] = useState('');
    const [card,setCardNameValue] = useState('');
Add Feedback and Calls to Event Handlers to the Form
<div id="cardUIDiv">
  <br />
  Search: <input type="text" id="searchText" placeholder="Card To Search For" onChange={handleSearchTextChange} />
  <button type="button" id="searchCardButton" className="buttons" onClick={searchCard}> Search Card</button><br />
  <span id="cardSearchResult">{searchResults}</span>
 
  <p id="cardList">{cardList}</p><br /><br />
 
  Add: <input type="text" id="cardText" placeholder="Card To Add" onChange={handleCardTextChange} />
  <button type="button" id="addCardButton" className="buttons" onClick={addCard}> Add Card </button><br />
 
  <span id="cardAddResult">{message}</span>
</div>
Add the Event Handler functions
After the addCard and searchCard functions, add these two:
    function handleSearchTextChange( e: any ) : void
    {
        setSearchValue( e.target.value );
    }
    function handleCardTextChange( e: any ) : void
    {
        setCardNameValue( e.target.value );
    }
Update addCard and searchCard to print the input values
Again, this is placeholder code until we wire it up to the API.
    function addCard(e:any) : void
    {
         e.preventDefault();
         alert('addCard() ' + card);
    };
    function searchCard(e:any) : void
    {
        e.preventDefault();
        alert('searchCard() ' + search);
    };
Test
You should now get a login page when you access the app:
Login as user RickL with password COP4331
You should now see the Cards UI:
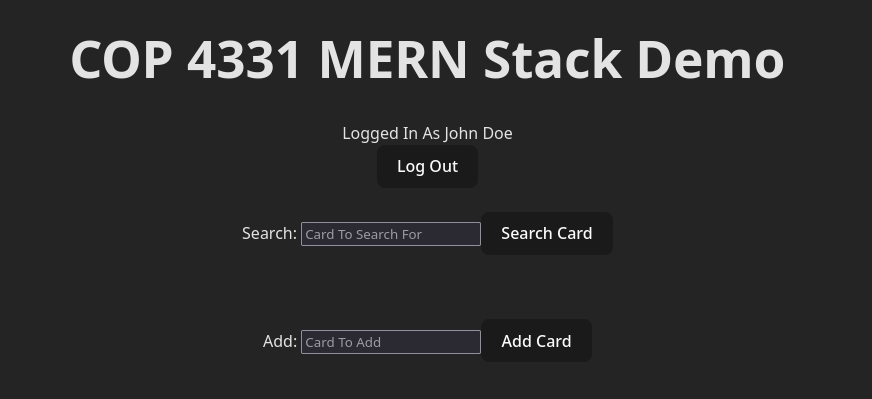
Typing into either field and clicking the respective action button should result in a JavaScript alert box with the function that was called and the input you provided.
Don’t forget to commit!
API without Database Access
Now let’s setup a basic API.
Add Sample Data
Change into the project’s backend directory.
Edit server.js to add the following after the two require lines:
var cardList =
[
'Roy Campanella',
'Paul Molitor',
'Tony Gwynn',
'Dennis Eckersley',
'Reggie Jackson',
'Gaylord Perry',
'Buck Leonard',
'Rollie Fingers',
'Charlie Gehringer',
'Wade Boggs',
'Carl Hubbell',
'Dave Winfield',
'Jackie Robinson',
'Ken Griffey, Jr.',
'Al Simmons',
'Chuck Klein',
'Mel Ott',
'Mark McGwire',
'Nolan Ryan',
'Ralph Kiner',
'Yogi Berra',
'Goose Goslin',
'Greg Maddux',
'Frankie Frisch',
'Ernie Banks',
'Ozzie Smith',
'Hank Greenberg',
'Kirby Puckett',
'Bob Feller',
'Dizzy Dean',
'Joe Jackson',
'Sam Crawford',
'Barry Bonds',
'Duke Snider',
'George Sisler',
'Ed Walsh',
'Tom Seaver',
'Willie Stargell',
'Bob Gibson',
'Brooks Robinson',
'Steve Carlton',
'Joe Medwick',
'Nap Lajoie',
'Cal Ripken, Jr.',
'Mike Schmidt',
'Eddie Murray',
'Tris Speaker',
'Al Kaline',
'Sandy Koufax',
'Willie Keeler',
'Pete Rose',
'Robin Roberts',
'Eddie Collins',
'Lefty Gomez',
'Lefty Grove',
'Carl Yastrzemski',
'Frank Robinson',
'Juan Marichal',
'Warren Spahn',
'Pie Traynor',
'Roberto Clemente',
'Harmon Killebrew',
'Satchel Paige',
'Eddie Plank',
'Josh Gibson',
'Oscar Charleston',
'Mickey Mantle',
'Cool Papa Bell',
'Johnny Bench',
'Mickey Cochrane',
'Jimmie Foxx',
'Jim Palmer',
'Cy Young',
'Eddie Mathews',
'Honus Wagner',
'Paul Waner',
'Grover Alexander',
'Rod Carew',
'Joe DiMaggio',
'Joe Morgan',
'Stan Musial',
'Bill Terry',
'Rogers Hornsby',
'Lou Brock',
'Ted Williams',
'Bill Dickey',
'Christy Mathewson',
'Willie McCovey',
'Lou Gehrig',
'George Brett',
'Hank Aaron',
'Harry Heilmann',
'Walter Johnson',
'Roger Clemens',
'Ty Cobb',
'Whitey Ford',
'Willie Mays',
'Rickey Henderson',
'Babe Ruth'
];
Add API Endpoints
Add the following method calls after the app.use(express.json())
Endpoint for Adding a Card
app.post('/api/addcard', async (req, res, next) =>
{
// incoming: userId, color
// outgoing: error
var error = '';
const { userId, card } = req.body;
// TEMP FOR LOCAL TESTING.
cardList.push( card );
var ret = { error: error };
res.status(200).json(ret);
});
Endpoint for Login
app.post('/api/login', async (req, res, next) =>
{
// incoming: login, password
// outgoing: id, firstName, lastName, error
var error = '';
const { login, password } = req.body;
var id = -1;
var fn = '';
var ln = '';
if( login.toLowerCase() == 'rickl' && password == 'COP4331' )
{
id = 1;
fn = 'Rick';
ln = 'Leinecker';
}
else
{
error = 'Invalid user name/password';
}
var ret = { id:id, firstName:fn, lastName:ln, error:error};
res.status(200).json(ret);
});
Endpoint for Searching Cards
app.post('/api/searchcards', async (req, res, next) =>
{
// incoming: userId, search
// outgoing: results[], error
var error = '';
const { userId, search } = req.body;
var _search = search.toLowerCase().trim();
var _ret = [];
for( var i=0; i<cardList.length; i++ )
{
var lowerFromList = cardList[i].toLocaleLowerCase();
if( lowerFromList.indexOf( _search ) >= 0 )
{
_ret.push( cardList[i] );
}
}
var ret = {results:_ret, error:''};
res.status(200).json(ret);
});
Test with Postman
- Enter the URL for the API (e.g.
http://localhost:5000) - Set to
application/jsoncontent type - Set to
POST - Click on body and then raw
- Add JSON to the body:
for /api/login:
Result:
for /api/addcard:
Result:
Important
In this example app, endpoints will always return a JSON object. The status of the request is indicated by the “error” property.
If the request succeeded, the error will be empty, otherwise its value will be a message indicating the error that occurred.
for /api/searchcards:
Result:
Update Login to use the API
Replace doLogin() in Login.tsx
async function doLogin(event:any) : Promise<void>
{
event.preventDefault();
var obj = {login:loginName,password:loginPassword};
var js = JSON.stringify(obj);
try
{
const response = await fetch('http://localhost:5000/api/login',
{method:'POST',body:js,headers:{'Content-Type': 'application/json'}});
var res = JSON.parse(await response.text());
if( res.id <= 0 )
{
setMessage('User/Password combination incorrect');
}
else
{
var user = {firstName:res.firstName,lastName:res.lastName,id:res.id}
localStorage.setItem('user_data', JSON.stringify(user));
setMessage('');
window.location.href = '/cards';
}
}
catch(error:any)
{
alert(error.toString());
return;
}
};
Test login http://localhost:5173/login
Make sure you can still login as RickL
Update CardUI.tsx to use the API
let _ud : any = localStorage.getItem('user_data');
let ud = JSON.parse( _ud );
let userId : string = ud.id;
let firstName : string = ud.firstName;
let lastName : string = ud.lastName;
    const [message,setMessage] = useState('');
    const [searchResults,setResults] = useState('');
    const [cardList,setCardList] = useState('');
    const [search,setSearchValue] = useState('');
    const [card,setCardNameValue] = useState('');
    function handleSearchTextChange( e: any ) : void
    {
        setSearchValue( e.target.value );
    }

    function handleCardTextChange( e: any ) : void
    {
        setCardNameValue( e.target.value );
    }
async function addCard(e:any) : Promise<void>
{
e.preventDefault();
let obj = {userId:userId,card:card};
let js = JSON.stringify(obj);
try
{
const response = await fetch('http://localhost:5000/api/addcard',
{method:'POST',body:js,headers:{'Content-Type': 'application/json'}});
let txt = await response.text();
let res = JSON.parse(txt);
if( res.error.length > 0 )
{
setMessage( "API Error:" + res.error );
}
else
{
setMessage('Card has been added');
}
}
catch(error:any)
{
setMessage(error.toString());
}
};
async function searchCard(e:any) : Promise<void>
{
e.preventDefault();
let obj = {userId:userId,search:search};
let js = JSON.stringify(obj);
try
{
const response = await fetch('http://localhost:5000/api/searchcards',
{method:'POST',body:js,headers:{'Content-Type': 'application/json'}});
let txt = await response.text();
let res = JSON.parse(txt);
let _results = res.results;
let resultText = '';
for( let i=0; i<_results.length; i++ )
{
resultText += _results[i];
if( i < _results.length - 1 )
{
resultText += ', ';
}
}
setResults('Card(s) have been retrieved');
setCardList(resultText);
}
catch(error:any)
{
alert(error.toString());
setResults(error.toString());
}
};
return(
<div id="cardUIDiv">
<br />
<input type="text" id="searchText" placeholder="Card To Search For" />
<button type="button" id="searchCardButton" className="buttons"
onClick={searchCard}> Search Card </button><br />
<span id="cardSearchResult"></span>
<p id="cardList"></p><br /><br />
<input type="text" id="cardText" placeholder="Card To Add" />
<button type="button" id="addCardButton" className="buttons"
onClick={addCard}> Add Card </button><br />
<span id="cardAddResult"></span>
</div>
);
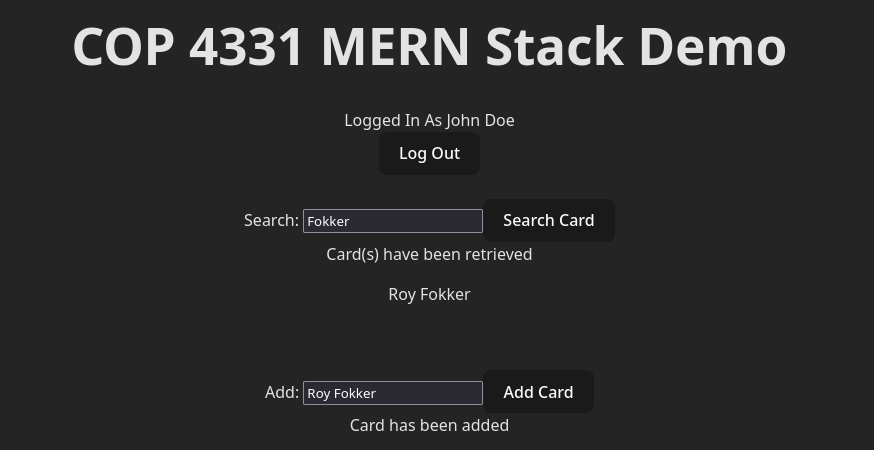
Test
- Add an entry to the database. You should see “Card has been added”
- Search for that entry. It should be displayed below the search field.
Create MongoDB Cluster
Create a Cluster
- Select the Free tier
- Accept the defaults
Setup your user
Choose a Connection Method
- select drivers
- We’ve already installed the mongodb client library in Node
- Copy the connection string. We’re going to update our
server.jswith this information.
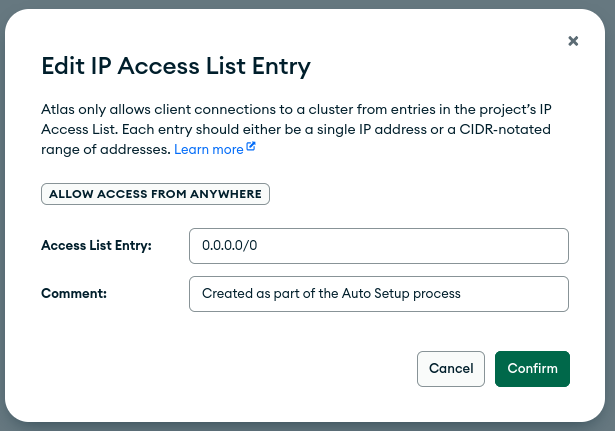
Update Network Access settings
- Under Network Access (left-hand menu), select the IP Access List tab
- Click Edit on your current list.
- Click the “Allow Access from Anywhere” button.
- You should now see your access list updated with 0.0.0.0/0:
Update server.js with the database connection code
This is an example. Replace the connection URL with that from your cluster info:
const MongoClient = require('mongodb').MongoClient;
const url = 'mongodb+srv://johnaedo_db_user:PASSWORD@cluster0.cts5eww.mongodb.net/?retryWrites=true&w=majority&appName=Cluster0';

const client = new MongoClient(url);
client.connect();
Remove the cardList array
We’ll be using MongoDB going forward, so we don’t need that list anymore.
Update the login route to use MongoDB for the user store
Change api/login
app.post('/api/login', async (req, res, next) =>
{
  // incoming: login, password
  // outgoing: id, firstName, lastName, error

 var error = '';

  const { login, password } = req.body;

  const db = client.db('COP4331Cards');
  const results = await db.collection('Users').find({Login:login,Password:password}).toArray();

  var id = -1;
  var fn = '';
  var ln = '';

  if( results.length > 0 )
  {
    id = results[0].UserID;
    fn = results[0].FirstName;
    ln = results[0].LastName;
  }

  var ret = { id:id, firstName:fn, lastName:ln, error:''};
  res.status(200).json(ret);
});
Update LoggedInName
Let’s use the browser’s localStorage feature to keep track of our user and display their info in the LoggedInName component.
Replace LoggedInName:
function LoggedInName()
{
    function getCurrentUserName() {
        var data;
        data = JSON.parse(localStorage.getItem('user_data') || '');
        return data.firstName + ' ' + data.lastName;
    }
    function doLogout(event:any) : void
    {
	    event.preventDefault();
        localStorage.removeItem('user_data');
        window.location.href = '/';
    };

    return(
      <div id="loggedInDiv">
        <span id="userName">Logged In As {getCurrentUserName()} </span><br />
        <button type="button" id="logoutButton" className="buttons"
           onClick={doLogout}> Log Out </button>
      </div>
    );
};

export default LoggedInName;
Edit api/addcard
app.post('/api/addcard', async (req, res, next) =>
{
  // incoming: userId, color
  // outgoing: error

  const { userId, card } = req.body;

  const newCard = {Card:card,UserId:userId};
  var error = '';

  try
  {
    const db = client.db('COP4331Cards');
    const result = db.collection('Cards').insertOne(newCard);
  }
  catch(e)
  {
    error = e.toString();
  }

  var ret = { error: error };
  res.status(200).json(ret);
});
Edit api/searchcard
app.post('/api/searchcards', async (req, res, next) =>
{
  // incoming: userId, search
  // outgoing: results[], error

  var error = '';

  const { userId, search } = req.body;

  var _search = search.trim();

  const db = client.db('COP4331Cards');
  const results = await db.collection('Cards').find({"Card":{$regex:_search+'.*', $options:'i'}}).toArray();

  var _ret = [];
  for( var i=0; i<results.length; i++ )
  {
    _ret.push( results[i].Card );
  }

  var ret = {results:_ret, error:error};
  res.status(200).json(ret);
});
Test
Created : April 12, 2026